Thursday, November 15, 2012

The Paste Menu is Grey when I Right Click in OWA

I had a customer who was complaining that on his new Windows 7 PC he could no longer right-click in OWA and paste.  He could use CTRL + V, but he didn't want to - he wanted to use his mouse.

I searched high and low online for an answer to this problem and found all kinds of suggestions:

  • Don't use IE 9, go to IE 8
  • Don't use IE 8, go to IE 7
  • Go into Developer Tools and change browser mode to IE 7
  • Edit the registry
  • Set the OWA site as trusted

None of that worked.

I finally stumbled on a FAQ on a military website that mentioned that you would lose the ability to right-click and paste if you installed the S/MIME control for OWA.

I realized, that was something I had done early on for this user when setting up his PC.  So I then naturally thought "what if I uninstall the S/MIME control - will that fix it?"

I looked it up, and uninstalling the S/MIME control is rather easy.  You open up:
  1. Start->
  2. Control Panel->
  3. Add or Remove Programs (XP) /Programs and Features (Vista/7)
  4. Look for the “Microsoft Outlook Web Access S/MIME” entry.
  5. Uninstall that puppy!
After uninstalling I went back into OWA (no reboot necessary) and the right-click paste functionality was back!

So folks, that's how you do it.  You're welcome!


Wednesday, August 22, 2012

Upgrading to Larger Drives in RAID1 Array with Intel RAID controller and Not Losing Data

I had a job yesterday in which I needed to upgrade the two 160GB Hard Drives in a customer's Dell Server, and replace them with 500GB drives.  The server uses an Intel 82801GR/GH SATA RAID Controller and has the Intel Matrix Storage Console software installed.

I removed one of the 160GB drives and let the RAID rebuild itself to the 500GB drive in Windows.  I then rebooted, removed the second 160GB drive, installed the second 500GB drive, and allowed that drive to be rebuilt in Windows.

I quickly discovered that both 500GB drives only showed up in the Server as 160GB, because the RAID volumes were that size.  What to do??

I installed Easeus Partition Master Server Edition thinking that would let me re-size the drive(s), but no - it showed the RAID as having a max of 160GB.

I finally discovered a post online that detailed what to do, and these are the steps that worked:

  1. Remove one of the two original, smaller drives and replace it with one of the larger drives.
  2. Rebuild original RAID1 array to new, larger drive.
  3. Shut Down PC and remove the other, smaller drive (you should only have the one larger hard drive in the computer at this point)
  4. Turn computer on and press CTRL+I to enter RAID Configuration
  5. Break the RAID on the one larger drive
  6. Reboot into Windows and open  Easeus Partition Master Server Edition (or your favorite partition resizing software)
  7. Resize drive to use its full capacity
  8. Shut down computer and install second larger drive
  9. Reboot into Windows and open the Intel Matrix Storage Console software
  10. Click Actions --> Create RAID Volume from Existing Hard Drive
  11. Select your Windows Volume as the source drive, and your newly installed, second larger drive as the mirror drive
  12. The Intel Matrix Storage Console software will begin mirroring your larger drive volume to the second larger drive.
When all is said and done, your new RAID1 Array should be complete, and you should see an array status such as this:


Hope this can help someone.  Cheers!

Monday, August 20, 2012

Deleting the hal.dll file in Windows XP can delete the ACPI Advanced Power Management (APM) functions of your computer

I recently had a customer with a virus infection that resulted in a missing hal.dll file error message when Windows XP Home started.  I booted Windows from the installation CD and went into the recovery console.  I copied the Hal.dll file from the CD to the Windows System 32 directory, as detailed here: http://pcsupport.about.com/od/fixtheproblem/ht/restorehaldll.htm

After I replaced the file, it still wouldn't boot, and I discovered that the boot.ini file had been corrupted/deleted.  As a result I re-entered the recovery console from the Windows XP CD and rebuilt the boot.ini file, as detailed here: http://support.microsoft.com/kb/330184

The computer booted up just fine and we continued to remove the virus files and fix other errors on the computer.

The customer called back to say that when he told the computer to shut down, he was now getting a message that "It is Now Safe to Turn Off Your Computer" and looked like this:
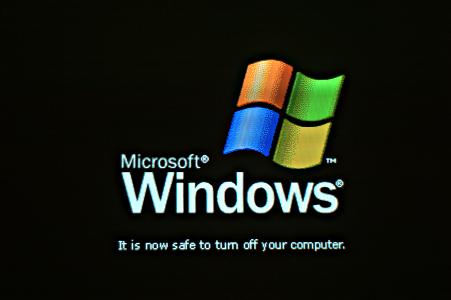


I returned to his house and discovered that as a result of replacing the hal.dll file, the computers Advanced Power Management features were missing, and instead of showing an ACPI PC in Device Manager, it showed a Standard PC:


When I went into Power Options in Control Panel, several ACPI-related options such as Sleep, Hibernate, and the Power Button options were missing.  All the guides I read said that if that happened, you had to completely reinstall Windows XP.

Before I went ahead with that, I discovered some instructions on another blog that detailed how to edit the Registry and then perform a hardware upgrade of the "Standard PC" to an ACPI-compatible PC.  I performed the steps and it fixed the ACPI-related problems.  Here are the steps (which should only be performed if you are SURE your PC is ACPI-compatible):


  1. Regedit. Browse to:
    HKLM\System\CurrentControlSet\Enum\Root\PCI_HAL000
  2. Right click the 0000 key and choose “Permissions…”.
  3. Check the “Full Control” checkbox for “Everyone”. This allows you to edit this next value…
  4. Open the “HardwareID” value and change it from “e_isa_up” to “acpipic_up” (followed by one line break, the cursor should be on the line directly under “acpipic_up”).
  5. Open Device Manager, open the “Computer” key, right-click “Standard PC”, and select “Update Driver”.
  6. You’ll pick from a list, don’t search, answer accordingly.
  7. Select the ACPI entry, which will now be shown in the Compatible Hardware list (joy!), thanks to the reg-tweak.
  8. Once again, if you actually CONTINUE with this, and your system is NOT originally an ACPI system, it very well may make it unbootable.
  9. Select “Next” and let the new HAL install.
  10. Reboot, and you’re done! Enjoy your ability to select the multi-processor HAL once again if you were curiously poking around. Since hal.inf locks you into only “compatible” HALs, you can now update again and select Multi-Processor PC if your system supports it, then you’ll have multi-cores again.
                  These original instructions are located here: http://falconfour.wordpress.com/2011/03/19/how-to-switch-windows-xp-hal-_back_-from-standard-pc-to-acpi-the-clean-way/, and I thank the poster for helping me avoid a complete Windows XP reinstall.

                  Tuesday, July 31, 2012

                  Vonage vs. MagicJack - A Comparative Analysis

                  I am a IT professional and have my own IT company in Palm Beach Gardens, FL.  I often need to research topics that are not easily found with simple searches on the internet and require me to piece information together to come up with a solution.  My goal with this blog is to share some of the information I've compiled every few days, in hopes that some may find it interesting and others may find it useful.

                  My first post today will be about some of the basic pros and cons a customer asked me to compile about Vonage and MagicJack.  Neither service is very transparent about their plans, services and pricing, so I hope this information can help someone who is comparing the two services:


                  Vonage
                  MagicJack
                  Initial Setup Fee:
                  FREE with 12 mo. Agreement & Month to Month Plans
                  None, besides equipment purchase. One year of free local and long distance calling to the United States, Canada, Puerto Rico and the US Virgin Islands are included with your initial purchase.

                  Equipment Costs:
                  FREE with 12 mo. Agreement & Month to Month Plans
                  magicJack™ USB Phone Jack = $40 (requires PC connection)

                  magicJack PLUS™ VoIP Phone Adapter = $70 (can be plugged in to PC or used stand-alone)

                  Able to Port Existing Number:
                  Yes, FREE
                  Yes, $19.99 one-time fee and $9.95 annual charge after the first year

                  Initial Term Required:
                  12 mo. Agreement or Month to Month Plans (30 day money-back guaranty)

                  No Term Required
                  Basic Residential Calling Plan:
                  $9.99/mo. + tax

                  One year of free local and long distance calling to the United States, Canada, Puerto Rico and the US Virgin Islands are included with your initial purchase.

                  Fax Service Supported:
                  Yes, included at no charge with residential plan
                  Yes, included at no charge with equipment purchase

                  International Calling:
                  $9.99/mo. for 6 months, then $24.99/mo. w/ 12 mo. Agreement.  If month-to-month it’s $9.99/mo. for 3 months, then $24.99/mo. ($0.25 to $0.28/min for international cell calling)

                  You must prepay for international minutes (Italy, Germany & UK = $0.02/min)
                  Early Termination Fee:
                  $120 Termination Fee w/ 12 mo. Agreement (reduces by $10/mo. each month during term)
                  No Termination Fee